Introduction
This blog post will focus on basic photography rules and tips. The first section will focus on what we call “rule of thirds”. The second section will focus on “leading lines”. Finally, the third section will focus on “depth of field”. Each section will have analysis and pictures as a visual.
Rule of Thirds
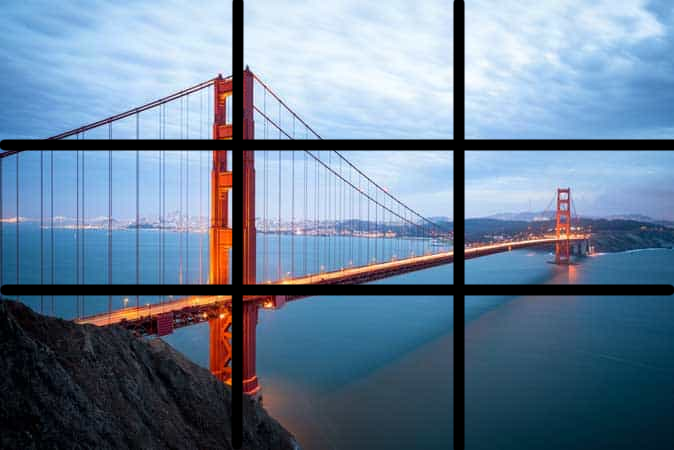
The “rule of thirds” is quite simple to understand and apply after practice. The rule is to evenly divide your picture into 9 even rectangles. There should be two horizontal and two vertical lines. Imagine a tic-tac-toe board on your picture. The rule states that the best place for your main object in the picture is to be placed along these lines, specifically where the lines meet.
In this specific photo of the Golden Gate bridge in San Francisco, CA, we can see that the focus of the image is meant to be on the beginning of the bridge. The left vertical line runs perfectly along the bridge as both horizontal lines meet the vertical. The photographer is unknown, but the New York Institute of Art takes credit.

Here is my own attempt at practicing the rule of thirds. This is a picture of my wife and son on our hike this past week. It was difficult with two people, but I managed to align my son’s face with the lower right intersecting lines and my wife’s face lines up with the right horizontal lines. Here chin meets the bottom line, as her forehead meets the top.
")

Leading Lines
Leading lines is an underused principle in photography. A photo with leading lines is meant to draw the viewers eyes from one point to an end point, almost going through it. Imagine a tunnel or a long road.
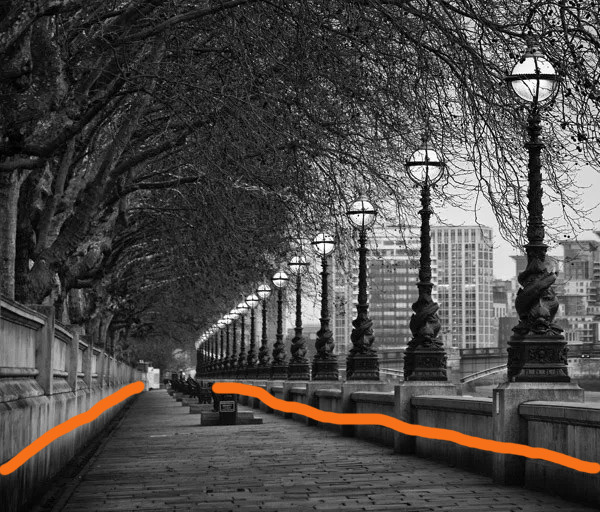
In this next picture we can see that the walls and the and walkway provide nice leading lines which draw the viewers eyes “down-stream”. The lamp posts and the trees also provide leading lines. This photo was taken by the Digital Photography School.

I made my own attempt at following the leading lines principle. The pathway creates natural leading lines as does the the fence on the left and the tree line on the right.


Depth of Field
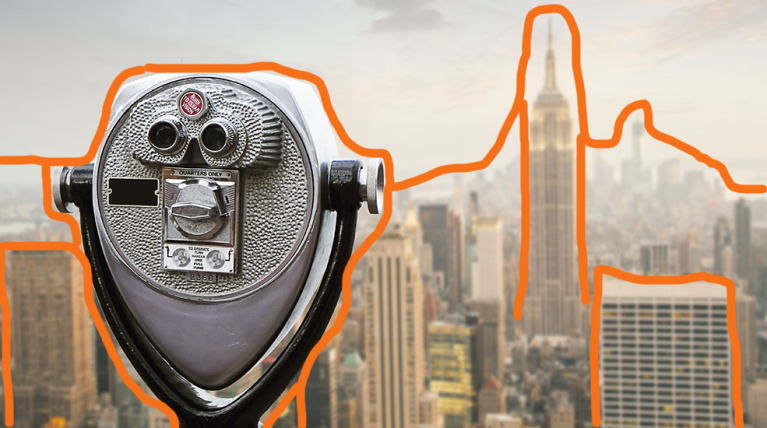
The depth of field, otherwise known as “focus range”, is where part of an object is in focus and part is not. Imagine you are standing on top of the empire state building looking down. If you were to focus on the streets below, those streets would be clear, but the hand rails would be fuzzy. Or if you were staring at the handrails, the streets below would be fuzzy.
Speaking of the empire state building, here is a picture stationery binoculars overlooking New York City. You will notice that the stationary binoculars are in focus, and the backdrop of the city is not. This is what we mean when we use depth of field. Shutterstock owns this photo. You will noticed that I outlined a few of the buildings. I did this to show that these buildings aren’t just far away, but are not in focus.


The depth of field is shown by the focus on my wife and son, and the lack of focus on the back ground including the dirt, trees, and sky.
Conclusion
All three of these photography rules are simple, yet effective ways to improve your photography habits. If you can visualize a 3X3 grid, allow lines to enhance your picture, and sharpen certain elements of a photo, you will be well on your way to becoming a great amateur photographer.
